An Introduction to DIY Wooden Fence Installation
This guide will walk you through the process of a DIY wooden fence installation. From planning and preparation to maintenance tips, we’ll cover everything you need to know to ensure a successful project.
Table of Contents
Planning Your Fence
- Determine the Purpose of Your Fence:
The first step in planning your fence is to determine its main purpose. Will it be used for privacy, security or aesthetics? Knowing the primary goal will help you choose the appropriate height, materials, and style for your fence.- If you need privacy from neighbors or passersby, choose a tall fence made from solid materials like vinyl or wood panels. For security reasons, a chain-link fence with barbed wire may be more suitable. If aesthetics are a priority, consider a decorative metal or brick wall with plantings along its perimeter.
- Measure and Mark Your Fence Line:
Once you have determined your goals, measure the area where you want to install your fence. Use stakes and string to mark off where you want to install your fence line – this will give you an idea of what kind of fencing material would fit best in terms of length and material requirements. - Research Local Regulations and Permits:
It’s important to research local regulations regarding fencing before installing one yourself or hiring a contractor for installation. Check with your municipality if there are any fencing codes that apply to where you live – permitting fees should also be considered in order to ensure everything is done legally. - Choose Appropriate Material(s) for Your Needs:
There are various kinds of fencing materials available depending on preferences when it comes to durability, resistance against harsh weather elements wind storms etc., maintenance level required as well as desired aesthetic appeal.However choosing quality product that would serve you long-term advocacy in saving cost and energy.
Choosing Materials and Tools
Selecting a suitable wood type for your fence
When choosing a wood type for your fence, there are a few factors to consider: durability and aesthetics. Here are some options to consider:
- Cedar:
Cedar is a popular choice for fences due to its natural durability and resistance to decay. It has a beautiful reddish-brown color that weathers to a silver-gray over time. Cedar is known for its stability and resistance to warping, making it an excellent choice for long-lasting fences. - Redwood:
Redwood is another durable and naturally resistant wood. It has a distinct reddish color that adds a warm and attractive look to your fence. Redwood is known for its stability and resistance to insects and rot, making it a reliable choice. - Treated Pine:
Treated pine is a more affordable option compared to cedar and redwood. It is pressure-treated with chemicals to enhance its durability and resistance to decay, insects, and rot. Treated pine can be stained or painted to achieve the desired aesthetic while providing a reasonable level of durability.
Consider your budget, maintenance preferences, and the desired appearance when selecting the wood type for your fence.
Calculating the quantity of materials needed
To calculate the quantity of materials needed, you’ll need to measure the length of your fence and decide on the spacing between the fence posts and rails. Here’s a breakdown of the materials required:
- Fence boards:
Measure the length of your fence and divide it by the width of the fence boards to determine the number of boards needed. Add a few extra boards to account for any cutting or potential replacements. - Posts:
Decide on the spacing between your fence posts, typically between 6 to 8 feet apart. Measure the length of your fence and divide it by the spacing to determine the number of posts needed. You’ll also need to consider gate posts if you plan to install a gate. - Rails:
Determine the number of horizontal rails you want for your fence. Typically, two or three rails are used. Measure the length of your fence and multiply it by the number of rails to calculate the total rail length needed. - Nails/screws:
Estimate the number of nails or screws required based on the number of boards, posts, and rails. It’s advisable to have a few extra in case of any mishaps or replacements.
Gathering the necessary tools:
To build your fence, you’ll need a set of tools to ensure proper installation. Here are the essential tools:
- Post hole digger:
Used to dig holes for the fence posts. There are manual and powered options available. - Shovel:
Useful for digging and moving soil during the installation process. - Level:
Necessary for ensuring that the fence posts and rails are installed straight and level. - Measuring tape:
Used to accurately measure the length, spacing, and dimensions of the fence components. - Circular saw or handsaw:
Depending on your preference, you’ll need a saw to cut the fence boards and rails to the desired length. - Drill:
Required for pre-drilling holes and securing the fence boards and rails to the posts. - Hammer:
Used for driving nails or a screwdriver if using screws to attach the boards and rails.
Having these tools readily available will help you build your fence efficiently and accurately.
Related Articles: Choosing the Best Types of Wooden Fencing (2023)
Digging Post Holes
- Use a post hole digger to dig holes at regular intervals along the fence line.
- Ensure the holes are deep enough for stability (approximately one-third the height of the fence post).
- Space the holes evenly and align them properly.
Tip: Consider renting a power auger for larger projects to save time and effort.
Setting Fence Posts
- Place a fence post in each hole, ensuring they are level and plumb.
- Fill the holes with concrete mix or gravel, tamping it down for stability.
- Double-check the alignment and adjust if necessary before the concrete sets.
Tip: Applying a slope to the top of the concrete away from the post helps prevent water accumulation.
Attaching Rails and Panels
- Install horizontal fence rails between the posts, using a level for accuracy.
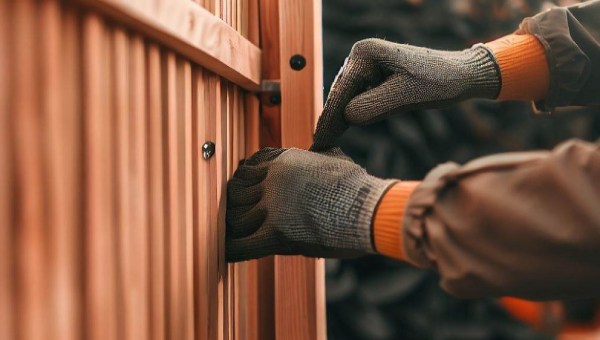
- Attach fence panels or individual boards to the rails, securing them with nails or screws.
- Trim any excess material and ensure consistent spacing between boards.
Tip: Pre-drill holes for nails or screws to prevent splitting the wood.
Adding Finishing Touches
- Apply a wood preservative or stain to protect the fence from weathering.
- Consider adding post caps or decorative elements for an enhanced appearance.
- Inspect the fence for any loose boards or fasteners and make necessary adjustments.
Conclusion
Summarize the key points of the DIY wooden fence installation process and encourage readers to embark on their own fence installation project. Reiterate the benefits of DIY and the satisfaction it can bring.
By following this step-by-step guide, you can successfully install a wooden fence on your own. Not only will you save money, but you’ll also have a beautiful and functional addition to your property. Happy fencing!
Remember, when installing a DIY wooden fence, proper planning, selecting the right materials and tools, digging post holes correctly, setting fence posts securely, attaching rails and panels accurately, and adding finishing touches are all crucial steps. By paying attention to these details, you’ll be well on your way to a successful fence installation project.